Saturday, July 21, 2012

Pinners and Paints: Teacher Edition

You'd think with summer here, I'd be getting more crafting and blogging done.  Ah, the life of a teacher.  I'm getting a lot of pinning done.  And sleeping.  But now I'm starting to get back in the swing of things, getting set to go back in and start a new year.  I'll be posting several projects that I'm working on for the new year.


First up: Quiet Critters! 


My inspiration comes from a fellow teacher and was found on Pinterest.


Visit Teaching Chick for this and more great ideas!
You can find Teaching Chick's blog here.


We all have those times when we just need the kids to work QUIETLY! Quiet Critters are a little tool to help us achieve those moments of quiet work time.  When it's time to put away their voices, you pass out a Quiet Critter.  If you notice someone talking, you move the Quiet Critter to the edge of their desk. Gotta give them a warning.  If they continue to talk, then you take the Quiet Critter.  When the quiet time is over, anyone who still has a Quiet Critter on their desk gets a prize, an extra sticker on their chart, a hole punch on their behavior card, or whatever you use as a behavior management system.  You're rewarding those who worked quietly, not just always punishing the disrupters.  I love it!  So of course, I had to make some of my own.
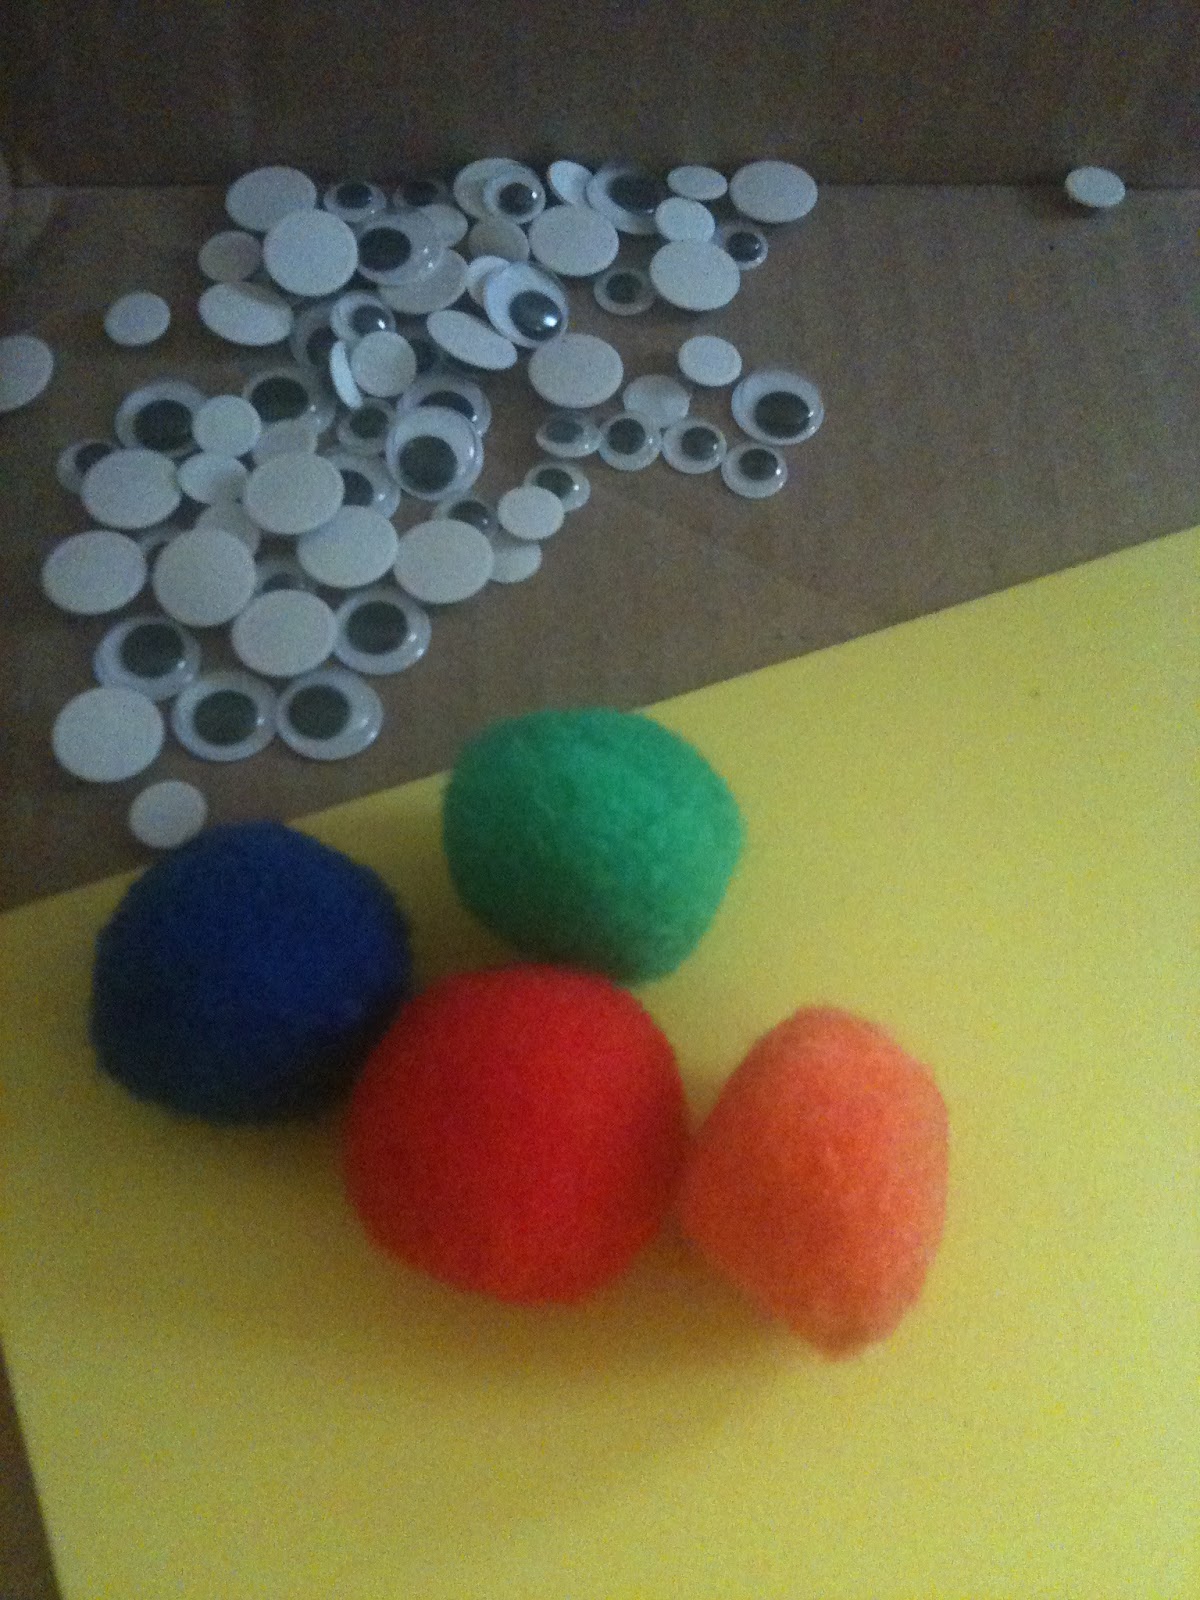

Materials:
  • pom poms 
  • wiggly eyes
  • felt or foam feet
  • glue gun
Easy, peasy, fresh and squeezy, that's all you need.  And the best part?  I found the eyes and pom poms in the dollar section of Target (along with some other organizational finds that you'll be seeing soon ;) and the foam was just a few bucks for 16 sheets.  


First thing I did was make the feet.  I found a size and shape that I liked and then traced them on the sheets of foam.  


Then, I hot glued the pom poms on the feet.  I tried a different glue at first, but it didn't hold well at all.  So when in doubt, get the glue gun out!

I really wanted to talk about my glue gun
just so I could post my new hot glue gun stand!
The eyes were self-adhesive so we'll see how well the sticky holds up.  There were two different sizes, so I mixed it up and put both sizes on the Critters. And now, I have a whole family of Quiet Critters just waiting for a whole class full of kids.  


How will you reward the "quiet critters" in your class?http://teachingchick.blogspot.com/2012/07/monday-made-it-3.html

Sunday, April 22, 2012

Banners

Another weekend has come and almost gone and I have yet to update with a blog.  Since I'm in the middle of a project, I thought I would go ahead and post.


I am making a banner for a co-worker's baby shower.  They're not finding out the sex of the baby until he or she shows up, so my co-hostess and I decided to go with a jungle theme since the nursery has a nursery theme.  I have many other projects in store, which is keeping my baby fever at bay (to the delight of my husband).


Materials:


  • felt (for letters, background pieces can be felt or fabric)
  • sewing machine (or a fabric glue, I'll show an example for that)
  • quilting ruler (or other measuring device)
  • pins
  • letters (mine came printed off the computer)
  • ribbon or cord
  • thread
  • scissors
  • and all of those other necessary things for sewing

The first thing I did was to cut the felt in half horizontally.


Next, I decided what font I wanted for my letters.  I typed the message for the banner and used about a 400 size to get them large enough.  I believe this time I used Kristin TLC (?).  I've also used a calligraphy font for a different banner.  The letters were cut out and pinned to the felt.  Then I cut out the letters using the paper letter as a guide.


Then, the letters were pinned and sewn to the background felt.


I had to create a pocket (if you will, I really don't know the correct word) to put the cord through.  I used my quilting ruler to make sure that all of the finished pieces would be the same size since the original pieces of felt weren't cut the same size in the factory.


The beginning of the final step is threading the cord through in order to make it a banner, instead of several pieces of felt.


Here is a sneak peak of the first word still in the pinned phase. This banner has 6 words with a total of 29 letters.  I know this project won't be finished tonight.


But I don't want to leave you without a finished project (again).  So I give you a picture of the banner I made for my husband and I's thank you card pictures from our wedding.  This banner was made using fabric for the background and ribbon as the connecting material.  I also just used fabric glue to put the letters on.  I didn't create a pocket for this and just slit the fabric towards the ends (yes, it was measured and even on each triangle) so I could thread the ribbon through.  The fabric was very thin and I tried to use some starch to give it some structure.  It didn't work as well as I'd thought it would so the ends are a little curly.


Photo taken by Lorenzfoto


What would you put on a banner?

Sunday, April 1, 2012

Two in One Day!?!

Must be like winning the lottery!! And no, I didn't win Mega Millions.  


Today's second post is going to be about some of the organization techniques I have used to try and control my craft crap (as my husband calls it).  We don't have the space in our current house for a craft room, although it has been promised to me in our next house, so I've tried to be creative in some of the ways I keep my stuff. Only two ideas today, hopefully I can pick up more tips to store my stuff from my creatively, crafty readers.


The first idea that I like is using a shoe organizer to store paint and other materials on the back of the closet door.


Looks like Bella's tail made an appearance!

Close up on the paint in the pouches.  
I've tried to separate my paints by color family.  I also keep my glues and stamps in here as well.


The second organizational idea is for ribbon.  I've made a few ribbon wreaths and I use ribbon in a lot of projects.  So how do you store all of those rolls?  My solution was a multilevel pants hanger from Bed, Bath, and Beyond.


It has it's flaws, but keeps my ribbon hung up and neat.
I noticed that if your ribbon roll is larger, they don't necessarily fit on every tier of this particular pants hanger.  It fits the need for now, but we'll see if I can't find or come up with another way to store all of my ribbon rolls.


Since I'm already planning my new craft room, even though we're not planning on moving any time soon, what are some of your favorite craft materials storage ideas?

Ring Bearer Ideas

A good friend of mine in Philadelphia is getting married at the end of this month.  She purchased a heart for her son to carry down with their rings on it but when she got it, it just was not the size she expected.  She's having a rustic wedding so I googled a bunch of ideas.  She let her son pick which one he liked, even though it wasn't necessarily the one she liked the best.  And then I hinted that "someone I knew" would love to make it for her.

So I give you my first experience in making a ring bearer pillow!

First off was a trip to David's Bridal to pick up a color swatch of her bridesmaids' dresses.  Then, a trip to JoAnn's. 

Materials:
  • fabric (I picked up a yard of a thick linen, just in case.)
  • flowers
  • ribbon
  • stuffing
  • twine (I think it was actually jute that I bought.)
  • hot glue gun
  • sewing machine!!!! (This is one of my first projects since I bought my new sewing machine!)

  • and sticks (What???  That's the surprise that came later!)
The materials trip was combined with lots of pictures sent to her because I wanted this to be perfect and exactly what she wanted. The first decision we made was the fabric choice. 

We ended up choosing the linen on the left.

Fabric swatch with the burlap
  Then it was a choice of what flower to use.

The wisteria with the rose

The wisteria with the winning ranunculus
The last decision, before she just handed it over to me and said "I trust your decision," was the ribbon.  I guess I deleted the choices we had but I still have a picture of the winning ribbon.  I just liked the idea of a sheer ribbon.


And then finally came the making of the pillow!  Which I don't have pictures of.  I really need to get better about taking pictures as I'm making stuff.  So I give you the sewing machine it was made on!

My new toy!

I started by sewing the ribbon to the outside of one of the pieces of fabric I'd cut.  Then I turned the outsides in and pinned.  I sewed the pillow mostly shut, leaving myself a space to turn it right side out and stuff.  I turned it, stuffed it, and then hand stitched it shut.  I had some issues with the machine closing it up, so I just hand stitched it.  I hope it holds.

After sewing, I wrapped the pillow with a length of jute.  I pulled the flowers off of their stems and hot glued them in place. Then I trimmed the length of the ribbon and secured the ends with some fray check.

Pillow before I trimmed the ribbons
But wait!  I mentioned sticks.  Where are the sticks in this project??  I knew this wasn't the one she liked the most, so I also really wanted to try the style that she liked.  I took a set of decorative sticks and cut them to size, wrapped them together with a length of wire, and then decorated.  

Stick ring bearer "pillow"
And I threw this one in the box to Philly too!  Just in case she can talk her little boy into carrying this one down the aisle.

What projects have you been involved with for someone else's wedding?

Sunday, February 26, 2012

Not quite done with the next one, but I've had a request for directions, so I thought I'd post what I had so far.


State String Art!  My inspiration comes from a friend of mine's "Pins I actually made!" board.


I decided that I wanted to do three states for my husband and I; where I'm from, where he's from, and where we met and live.


Materials:

  • board (the board I bought was a gigantic 4 foot pine panel from Lowe's)
  • Nails (I bought wire nails, 7/8 X 17 is the size listed on the container, not that it's much help without the unit)
  • string (I used normal white sewing thread)
  • hammer
  • state outline
  • paint or stain 
The first thing I did was stain my board.  I think I wanted more of a cherry but we already had a dark walnut stain at home, so I went ahead with the walnut.


Then I found state outlines and printed them out.  I enlarged mine so they would still fit on a single piece of paper, but there is a way you can get it done online to block it on more than one piece of paper.  But I don't remember what the site is, lol.  I'll update once I find that out.


After cutting out the outlines, I taped the outlines to the board.  I decided to start with Nevada since it's the middle state and one of the easier ones.  I hammered in nails around the outside of the template.


I probably could have nailed them closer together.  It might have helped with the overall appearance of the finished piece. Once I was finished with the state outline, I made a heart around where we live.  Then I picked a corner and tied the string to one of the nails.  After that, it's super important to hold onto the thread because you don't tie off the thread until you go all the way around the state.  


I plan on going back around a second time to make the thread more noticeable.  I think if I'd hammered the nails in closer, the thread might have stood out more.


I then moved onto Kansas.  I tried a different, more chaotic string wrapping technique, which I later cut off.


And here we have the finished piece so far.  I'll probably be redoing Kansas and quite frankly, New York scares me.


A friend on Instagram posted this nifty state string art of Louisiana, and I think it will help me solve my New York dilemma. Posting these directions has inspired me to possibly finish, so an update may be coming soon.


Which state would you be scared to attempt in string?


Wednesday, February 15, 2012

First blog post, better be a good one!  


Being an elementary school teacher, I was instantly drawn to the idea of melted crayon art.  For the life of me I can't find the blog that this picture belongs to (if you know, don't hesitate to let me know.  I'd love to give credit where credit is due!) but this was the picture that inspired my first piece of melted crayon art.


Materials:

  • crayons (I used two of the 64 count Crayola boxes)
  • canvas(es) (Again, I used two)
  • hot glue gun
  • hair dryer or heat gun (I used a hair dryer, but I've heard a heat gun works wonders)
  • paint (optional, for if you want to include images)
The first thing I did was find two pictures that I wanted to paint onto my canvases.  

Up Close
The Ballerina

The Little Girl Dreaming of becoming a Ballerina
Then came the excruciatingly tedious chore of peeling off the crayon labels.  I've seen some art pieces that have left the labels on.  I might just have to do that next time.


After what seemed like hours, I used a hot glue gun to put the crayons on the canvases. You can't put down a lot of glue. It won't last and you may need to hold down some of the crayons.


Then, it was time for some melting magic!  I will say that a power outage does not help with this process.  I do have some wax lumps from when I'd first started when the power went out.


And then the power went out
I don't think I've fully finished the piece because I'd like to go back in and cut away the wax that dripped on the painting.  I'll heat up an X-acto knife and then try to trim away from the dancers.  Then I'll go back in and repaint the ballerinas.

Not quite the finished product
So there you have my first (and only, thus far) melted crayon project.  I've also informed my husband that we must now have a little girl so we can hang this in her room.  If not, it'll end up going to my niece, along with some other fun projects I've done that I will share with you in blogs to come.


What creative, crafty projects have you done with melted crayons?